 Thanksgiving is so close, and the kids have all been counting down the days! I thought I would share a couple of the songs we have been singing together:
Turkeys All Around
(Tune: "Twinkle Twinkle Little Star)
Turkeys, turkeys, all around
On the fence, on the ground.
On the haystack, on the chair,
All around, everywhere.
Turkeys, turkeys all around.
Gobble, gobble, what a sound!
Great Big Turkey
(Tune: "I'm a Little Teapot")
I'm a great big turkey
'Cause I'm well fed.
Watch me spread my feathers,
watch me bob my head.
When I strut around
I waddle, waddle, waddle.
And when I talk
I "gobble, gobble, gobble."
I'm a great big turkey
And I'd love to stay.
But Thanksgiving's coming,
So, it's time to run away!
We all have these wonderful kids to be SO thankful for! :) I hope you all have a great Thanksgiving holiday!
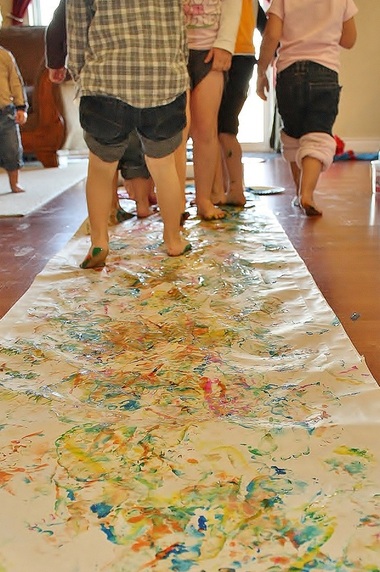
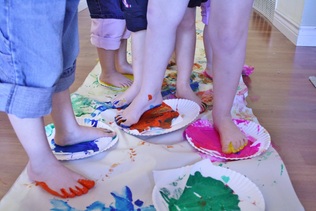 As promised yesterday, we painted using only our feet today! No, we didn't hold paintbrushes between our toes, our paintbrushes were our toes! The kids all watched very excitedly as I rolled out a big strip of paper and started pouring the paint, and once I said, "Go for it" boy, did they go!
I felt like I just had time to snap a few quick pictures before the paper was all full of little footprints and it was time to start washing little feet before they decided to wander all over the house! :) It was fun to hear all their chatter as they painted: "It's cold," "It's really slippery!" "Hey, I made brown!" "That blue one's my foot!" And though there were a couple that preferred to watch the excitement from the sidelines, I think they all thought it was a pretty entertaining experience!
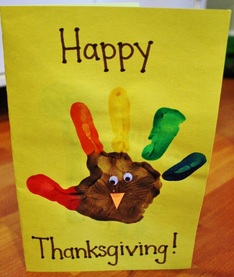
 This morning we used some fun, colorful feathers to paint on the letter "F." The kids seemed to have lots of fun just playing with their fluffy feathers before we even got out the paint, and once we did, they went to town!
When I asked the kids earlier to list some things we might be able to use for painting that begin with the letter "F" they came up with some great ones - feathers, fingers, and feet, to name a few! And they must have had lots of fun painting with the feathers, because no one even moved on to finger painting! We will have to do that another day. :) They are all very excited about the chance to paint with their feet though, so tomorrow I think we will be working together to paint a footprint poster to hang on the wall! It should be Fun! :)
 Today we brought our focus on the letter "E" into our science time by doing a fun Egg Experiment! Actually, it turned into several experiments, and we had lots of fun with it! Before we tried out our own experiments, we watched this awesome experiment from Steve Spangler....the kids were pretty amazed!
And even though I had to answer "no" to the very excited questions of "Are we going to do THAT?!?" they were still excited to see what was next. :) The first experiment we tried was the "floating egg." Here's how it works:
"The Floating Egg
It's so simple and amazing. A raw egg will float in very salty water but will sink in plain tap water. Why? Salt water is more dense than regular water. You'll need to make a very saturated salt solution by dissolving roughly 4 tablespoons of salt in about 2 cups of water. Use pickling or Kosher salt to make a clear salt solution. Table salt may be used, but the solution will be somewhat cloudy due to the additives used to make the salt free-flowing.
Fill a glass half full with the salt water. Slowly add plain water by pouring it down the sides of the glass, being careful not to mix the two liquids. Gently drop the egg into the water and watch as it sinks through the plain water, only to abruptly stop when it hits the salt water. The egg floats on the top layer of the salt water."
Not mixing the two layers is the tricky part, and I had to try that one out more than once!
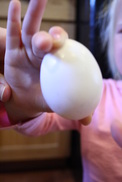
Next, we moved on to learning how an eggshell can be stronger than we are! The full description can be found on Steve Spangler's website, but basically, if you apply even pressure to the outside of an eggshell, you will not be able to break it, no matter how hard you squeeze...we even tried it with both hands! (Just make sure you aren't wearing any rings if you try this at home -that will cause the force to be unevenly distrubuted, and make a big mess!) :) And, due to the unique shape of an egg, it's strongest points are at the top and bottom of it's arched shape, so even if you squeeze with your forefinger at the top and your thumb at the bottom, it won't break! We tried squeezing at the sides, too, and were all amazed at how strong an eggshell really is. So, to complete our experiments, naturally we had to see what it takes to get the egg to break. Of course, since they have all gotten to help break eggs before, they knew that if we hit it on the side of our bowl, we would have our ending. We talked about how our hands made the force and pressure push on the egg all the way around, but we can break it easily when we put all the force in one place. And once we got it to crack open, they wanted to try putting it into the salt water again... so of course that's what we did. And we learned that the shell sank to the bottom while the yolk floated up to the surface. Pretty cool! :)
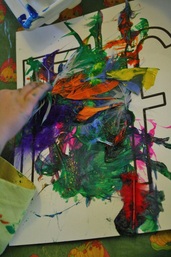
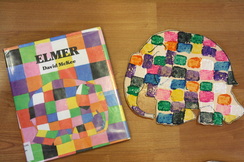 Today, we read the book "Elmer" by David McKee. If you haven't read "Elmer" before, it is about a patchwork elephant who tries to make himslef "elephant color" so that he would look just like any other elephant. But when the rain washes off Elmer's elephant color disguise, the other elephants are so glad to have him back that they decide to celebrate Elmer's Day each year. On that day, all the elephants color themselves and have a parade. Each one is different and each one is happy. To go along with the story, the kids each made their own Elmer Elephant by sponge painting their own design onto an "elephant colored" Elmer. The elephants turned out great - each one is different and each one is beautiful!
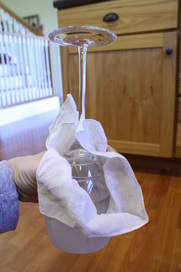 We tried out a new science experiment today from our favorite science guy - Steve Spangler (www.stevespanglerscience.com). He's also the one who has a whole lesson for kids using the super-fun jelly marbles! Today, though, we learned a little more about surface tension when we made a "gravity defying handkerchief" hold the water in an upside down glass.
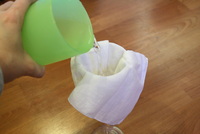
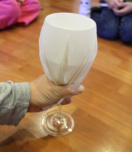
First, we put a handkerchief over the top of a glass (it has to be a glass with a round rim) and tucked it down in the center. Then, we poured some water into the glass through the handkerchief. Some of the kids were amazed that the water went through the handkerchief, so we talked about how there are tiny holes between the threads of the handkerchief that let the water go through into the glass.
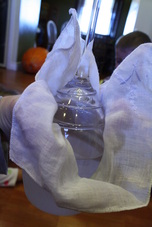
The next step was to slowly pull the handkerchief down to tightly cover the top of the glass. Then, I put my hand over the top of the glass, while tipping it upside down with the other. Once it is inverted, you can remove your bottom hand, and the water will stay in the glass! Straight from Steve Spangler himself, here is "how it works":
"Most people predict that the water will leak through the holes in the handkerchief because the water leaked through the holes as it was poured into the glass. The holes in the handkerchief literally disappeared when the cloth was stretched tightly across the mouth of the glass. This action allowed the water molecules to bond to other water molecules, creating what is called surface tension. The water stays in the glass even though there are tiny holes in the handkerchief because the molecules of water are joined together to form a thin membrane between each opening in the cloth. Be careful not to tip the glass too much because you'll break the surface tension and surprise everyone with a gush of
water!"
Now, the words I used with the preschool set were a little more like this:
"When we pulled the handkerchief tight and turned it upside down, the water held itself together on the other side of the handkerchief. That's called 'surface tension,' just like when we talked about how bubbles can hold together."
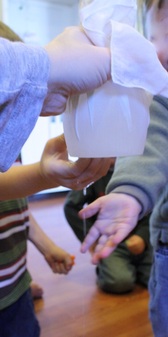
Of course, having a room full of curious kiddos, we had to test out the last part, too...what happens if you break that surface tension? So, they each got to take their turn poking at the bottom of the overturned glass to see if they could break the surface tension. They got a little bonus lesson on force when we saw that some could poke hard and fast enough to make the water leak out, and some couldn't.
I'm pretty sure that was their favorite part. :)
|


 RSS Feed